

Prerequisites
Before you start this tutorial, ensure you have the bot from the first tutorial running without errors.1. Add resource authorization
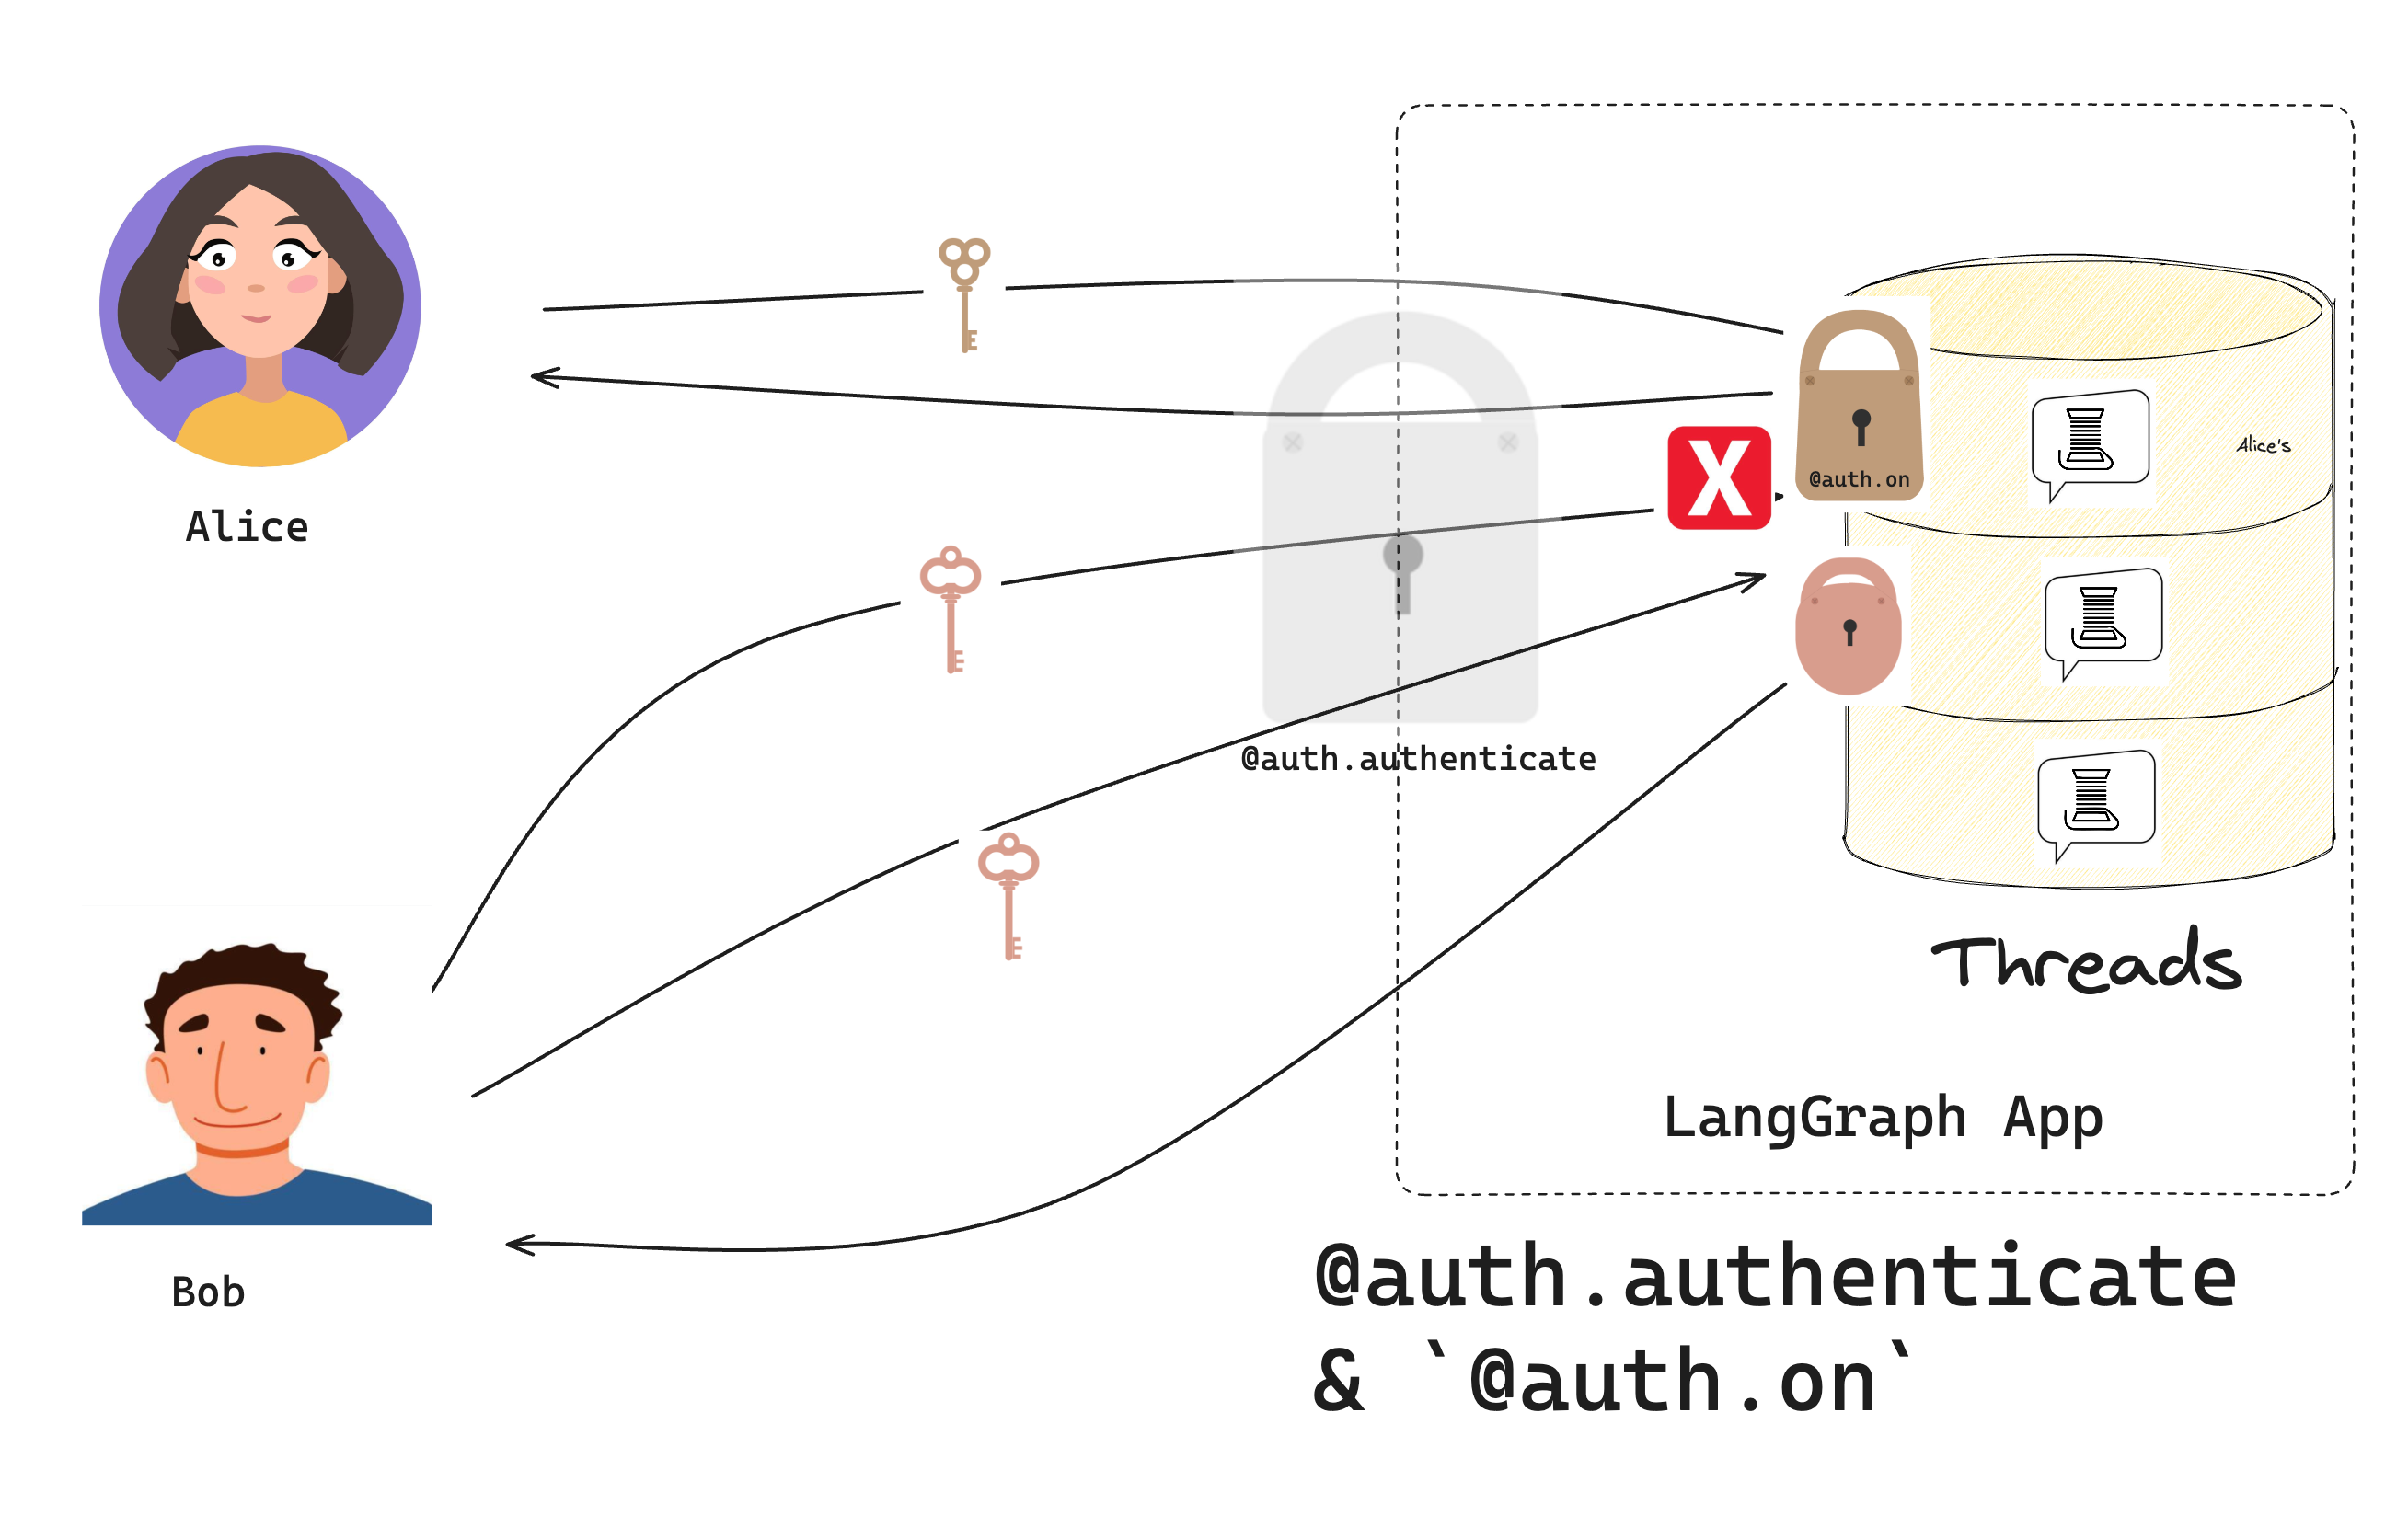
Recall that in the last tutorial, theAuth object lets you register an authentication function, which LangGraph Platform uses to validate the bearer tokens in incoming requests. Now you’ll use it to register an authorization handler.
Authorization handlers are functions that run after authentication succeeds. These handlers can add metadata to resources (like who owns them) and filter what each user can see.
Update your src/security/auth.py and add one authorization handler to run on every request:
src/security/auth.py
ctx(AuthContext): contains info about the currentuser, the user’spermissions, theresource(“threads”, “crons”, “assistants”), and theactionbeing taken (“create”, “read”, “update”, “delete”, “search”, “create_run”)value(dict): data that is being created or accessed. The contents of this dict depend on the resource and action being accessed. See adding scoped authorization handlers below for information on how to get more tightly scoped access control.
- Adds the user’s ID to the resource’s metadata.
- Returns a metadata filter so users only see resources they own.
2. Test private conversations
Test your authorization. If you have set things up correctly, you will see all ✅ messages. Be sure to have your development server running (runlanggraph dev):
- Each user can create and chat in their own threads
- Users can’t see each other’s threads
- Listing threads only shows your own
3. Add scoped authorization handlers
The broad@auth.on handler matches on all authorization events. This is concise, but it means the contents of the value dict are not well-scoped, and the same user-level access control is applied to every resource. If you want to be more fine-grained, you can also control specific actions on resources.
Update src/security/auth.py to add handlers for specific resource types:
- Creating threads
- Reading threads
- Accessing assistants
@auth.on.assistants) matches any action on the assistants resource. For each request, LangGraph will run the most specific handler that matches the resource and action being accessed. This means that the four handlers above will run rather than the broadly scoped “@auth.on” handler.
Try adding the following test code to your test file:
What’s Next?
Now that you can control access to resources, you might want to:- Move on to Connect an authentication provider to add real user accounts.
- Read more about authorization patterns.
- Check out the API reference for details about the interfaces and methods used in this tutorial.